Saturday, October 20, 2012

Building the Gertboard

I got my hands on a Gertboard the other day, and decided I would document the creation of it.

The first thing I saw when I opened the bags of kit were the SMD components - which scared me somewhat - having done a lot of soldering before but never with surface mount.  Still, the assembly manual included some good advice, and I wasn't too nervous about soldering them.
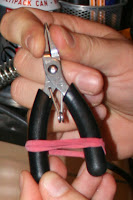
Elastic band around pliers to make life easier
Look! No Hands!
I went through the parts list, and realised that none of the SMD resistors or capacitors had their values on them, so had to look up all of the part codes on the Farnell website.  Not a big deal, but a bit of a pain, and beginners may get confused by having to do this...

Then I set off.  The advice on soldering SMD in the manual is very well written, and I had no issues when I followed it pretty much to the letter, despite not having decent tweezers, and having to find a couple of errant resistors which had pinged across the desk on a few occasions!

Firstly, a couple of tips.  As you can see in the picture to the right, I tightened an elastic band around my pliers to hold them together - this makes holding things in them a hands free operation, and make life a lot easier!  I also pre-soldered one of the two pads for all of the SMD devices, which meant I could easily identify them and could spend more time concentrating on the fiddly bits.
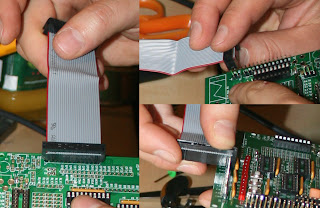
Using the IDC connector to keep header pins straight
Using the IDC connector to keep pins aligned
Secondly, the tip in the assembly manual which recommends using a sponge to keep the components flush with the board is a really good idea for the components, but it doesn't help keep the headers aligned.  I did this by using the ribbon cable IDC connector - also pictured, to ensure that the headers had the right spacing.  I could even use it for the long headers by using it at 90 degrees to the normal direction - between the joins between the sections of header.

All in all, the assembly went pretty smoothly, and (as I didn't have my multimeter to hand) I decided to risk it and went ahead and powered the board up straight away - without testing voltages, etc - I wouldn't recommend this, but I got lucky and it worked first time - I only checked with the button demo, I'll be playing with it more over the next few weeks / months.
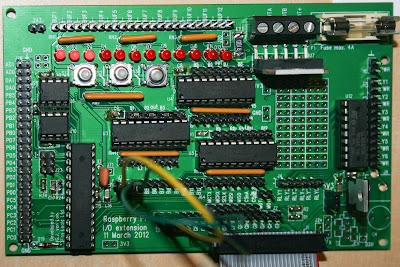
Completed, connected gertboard with jumpers ready for the button.c test program
The completed board, wired for the button test
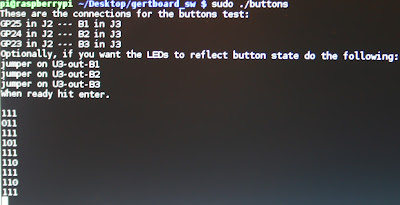
Running the buttons test on screen with the output shown
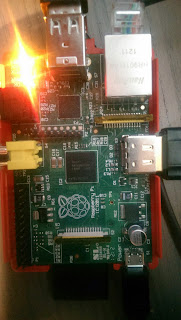
The button test running on the pi (sorry for the quality of this one!)
Finally, if you've held on for this long, here's a 1 minute rendition of me building the thing in stop motion...


Monday, October 15, 2012

Long time no blog!

Sorry for the long silence; I've been mentally busy at work, etc.

There's been a lot that has changed since I've been quiet; The Raspberry Pi is available at other stores (Maplin, CPC), has twice as much RAMRaspian is the new recommended image (and it's great, I love the automatic configurator that starts on first boot!), and Eben's released books 'Beginning Raspberry Pi' and 'Raspberry Pi User Guide'.  There's certainly some amazing stuff going on!

Anyway, my media centre project is going well.  I opted for Raspbmc for my RasPi media centre over OpenElec in the end (I'll post in more detail about this later), and it's working great!  I'll post soon about that, as well.  On the downside, I've had issues with my chosen USB Satellite decoder, it seems to be much more susceptible to slightly poor satellite signals compared with the PCI one I have in my Linux desktop, so I've switched back to that for now running TVHeadend.  When I get around to it I'll try the USB decoder/RasPi combo in a different place with a known good satellite signal.  If that works, I'll get a man in to repoint my dish! - I'm still hopeful that I can make something work with this.

In the meantime, I've consolidated my files, and got the Pi working as an Apple Time Machine server, which works really well - I'll be blogging about that shortly.  My intention is to take a Pi and an external HDD to a friend's house, when I'm there (on their Wi-Fi) my Mac will automatically back up to the Pi, and for only £ 25 more than the cost of the drive.

Also, my Gertboard arrives soon.  Hopefully I'll be able to work out how IO works properly then and put some more blog posts up.  Given time!

Monday, June 4, 2012

Building kernel modules

The Raspberry Pi is a very capable little machine, and there is support for common hardware devices provided out-of-the-box. However, you may come across a device that isn't supported, and need to build kernel modules to support it. This is remarkably simple once you get the right bits and pieces on your pi's filesystem, and quite a few people have produced how tos. Perhaps the most useful, and the one I've used to produce this guide is the one writte by Mchr3k on his blog in the article: 'Raspberry Pi Progress'. I've put my own steps below, but it is mainly based on his guide - thanks Mchr3k!

These instructions are tested on a clean install of debian straight from the Raspberry Pi website (I used version debian6-19-04-2012.zip), but you do need more than the default partition size, so resize the partition first (there's a useful guide here until I get around to writing one!).

We already have the build-essential package provided with the Pi which takes care of most of the compilation, but we need git to get the repository, libncurses5-dev to run the configuration menu and the command bc for the kernel build (not in build-essential).

sudo apt-get install git libncurses5-dev bc

Download the kernel sources from the Raspberry Pi source control repository, then link them to the kernel directory - I use a symlink here as means I can store the files on a larger filesystem (I have a USB attached drive)

git clone --depth 1 https://github.com/raspberrypi/linux.git
sudo ln -s `pwd`/linux /lib/modules/3.1.9+/build

Then, we get ready to do the kernel build. The Pi stores the current kernel configuration in the /proc/ filesystem, so we can use that to provide an initial setup - all these commands need to be done from the ~/linux directory.

gzip -dc /proc/config.gz > .config

Set up your new kernel, setting what you need to [M] in the configuration.

make menuconfig

Set up the building process, and start the build - NOTE you have to build the entire kernel the first time to ensure that the symbols are synchronised - the kernel doesn't need to be used for the modules to work (and if you want to add more modules in future, you can just do make modules) - does anyone know how to avoid having to do this?

make

Go and have a lot of coffee - this step takes a significant amount of time - like, about 6 hours!

Once this is done, and if you have any build errors, let me know, I may be able to point you in the right direction, we can now go ahead and install the modules:

sudo make modules_install

If the drivers you require also have firmware, then install that, too:

sudo make firmware_install

All done - congratulations!

What do you use your Pi for?

So I posted a poll a while ago, and although I didn't get many results, it seems people are quite interested in media using the RasPi...  I'm going to re-open the poll and post the results here.  I'm going to keep posting on a few topics, but will certainly be looking at the media use for the 'Pi.  I've got an OpenElec build running as my primary media source at home now, so will comment on this quite a bit over the coming weeks.

Education / teaching
  1 (7%)
Media
  6 (46%)
Something server (storage, etc)
  3 (23%)
Something hardware (measurements, automation)
  3 (23%)

Tuesday, May 22, 2012

Unconventional case

So I decided to make a really simple case...

It involves 83mm heat shrink, which you can buy here, and a hot air gun.

  • Cut to size, about 10mm or so outside the edges of the board
  • Cut a slot out for the HDMI connectors (or audio / composite if you're so inclined)
  • Apply hot air carefully so as to not distort the tubing around the HDMI cable
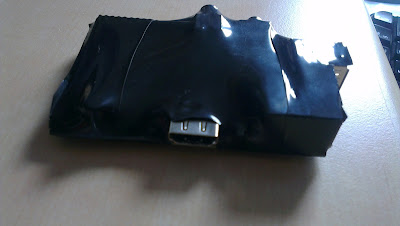
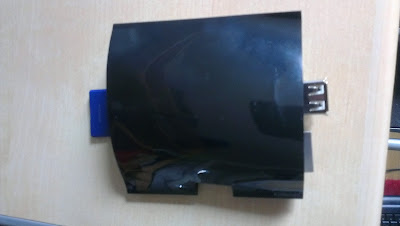
The result: A fairly well protected Pi that can work on a metal surface without shorting things...  It's not pretty, I grant you.

Pictures here (I failed to cut the tubing long enough so ended up layering a second one on:


Sunday, May 13, 2012

SD Card reviews

So I can't stress enough the requirement to read the Wiki in terms of supported SD card devices - ignore this advice at your peril!

I have tried two different cards at the moment - going to buy some more working ones soon...

16 Gb Class 10 KomputerBay - dd from /dev/zero = 1.2 MB/s
- hangs regularly with large IO operations (Debian) - DON'T USE THIS ONE!

4 Gb Class 4 Transcend - dd from /dev/zero = 3.8 MB/s
- Initial problem with read only device (sdb) on Ubuntu - fixed by GParted (Fedora & Debian) - otherwise works well.

4 Gb Class 4 SanDisk - dd from /dev/zero = 2.7 MB/s
- This is an older card, but works solidly - no problems.

Tools for managing SD images - kpartx

So for people who need to deal with creating or maintaining SD card images, or indeed full image backups of any storage device, kpartx is a godsend.

You most likely already know that you can mount images (created with dd) using loop:

mount -o loop -t vfat some-sd-image.img /mnt/mountpoint

But, this doesn't work for images that were created from the whole block device, as most of the RasPi images are.  You can mount them in the same way, but you need to work out what the sector offset is of the partition in order to just mount that (replacing sectors with the appropriate number for this image):

mount -o loop,offset=$(({sectors} * 512)) some-sd-image.img /mnt/mountpoint

Tedious, and hard to do - there's a full description here.

Well, there is a piece of magic which I hadn't previously heard of called kpartx, which allows you to do all of this in an easy command (described here).  To list the partitions on an image:

kpartx -l some-sd-image.img

And to add them as loop devices:

kpartx -a some-sd-image.img

Which can then be mounted as:

mount -t vfat /dev/loopXpY /mnt/mountpoint

You can clean up the /dev/loopX* again (after appropriate umount) with:

kpartx -d some-sd-image.img

Simples!

Thursday, May 10, 2012

XBMC with OpenElec

Firstly. Wow!  I was really impressed at how easy this was to build (not quick, mind), and also with the performance of the thing itself once installed...

I followed the instructions at OpenElec (parts 1 and 2) on a fairly vanilla Ubuntu installation running on Parallels on my mac.  It took a few hours to build (I went to bed, so not sure how many hours!) but had no errors whatsoever, and the instructions were perfect (I used GParted to shortcut a few of the command line partitioning steps in part 2, but that's the only thing I did differently).

Boot time the first time around is around 2 minutes, after that, it takes about a minute or so to boot.  It doesn't connect the HDMI port unless it's on during boot, which is a little annoying, but not the end of the world (I wonder if this can be fixed with a cron job checking for connectivity or something else?).

The XBMC interface runs pretty quickly, though between screens it takes a while (likely due to swap use, though I've not looked at what it actually does to the system during running yet).

Network browsing again is slow (i.e. listing large video plugin lists), but acceptable, and adding a UPNP source works just fine.  Doesn't seem to decode from Windows Media Centre; going to look into this later.  I'm pretty much decided that this will be my media centre of choice though - once I've figured out a way of getting BluRay and surround sound in my lounge without the PC. Hrm... :)

Kudos to OpenElec for getting such a useable and solid system up and running so quickly after release; let's hope it goes from strength to strength.

Tuesday, May 8, 2012

Media stuff

So, I think that the Pi is likely to work well as a Satellite decoder, but unlikely to be able to cope with more than sticking that data onto disk / across the network.  So what I'm thinking of is:

  • Use my routers (I have a pair of Buffalo WZR-HP-G300N/NH boxes running dd-wrt) as file servers with one or two large USB drives.
  • Get one of these which according to the Linux TV wiki is supported on Linux - I will endeavour to compile the drivers on arm first of course, before I commit to buying one of the boxes!
  • Build myself a PoE adaptor for the Pi - apparently (see FAQ) the team are going to think about providing support out of the box, but right now a small adaptor is easy enough to build, providing I can build it to also power the satellite adaptor...
  • Mount the Pi, the Satellite adaptor and PoE adaptor in a decent waterproof enclosure with suitable weatherproof ethernet connectors.
  • Find a good way of mounting this enclosure somewhere on a satellite dish mounting.
  • Think about support for two of the satellite adaptors - not sure if that'll work on one Pi, so, I'll get another one!
What does the world think?  I think this is a good solution for media providing you have a NAS somewhere in the house...  Obviously there are currently quite a few unknowns around performance of the ethernet interface (100BaseTX may not be enough for a single HD stream (is 72 Mb/s the right figure?), let alone two, but it's worth a try...

Pi-roblems

So a few observations so far about how it compares to faster desktop boxes.  Don't get me wrong, this isn't criticism about the Pi - I knew these things would be issues and for the price and size, what do you expect!  I wanted to list them here so that potential purchases of the Pi would realise that this is not a desktop machine - it will do some cool stuff, but you need to be careful to optimise it well and ensure that you don't expect too much of it.

Again, I'm going to update this thread regularly so watch this space.

Firstly, speed - it often sits in IOWait - this may be a compatibility issue with my SD card (16 Gb Class 10), but I doubt it! - It turns out the issue is the card on this one - see this post.

Secondly, networking - out of the box with Arch, MAC addresses are not maintained on boot.  This post addresses the issue so I'm going to try and upgrade the distro (though a pacman -SyU didn't fix it, it seems), I'll put a comment here and post in that thread if it does.

[UPDATE 8/5/12] it seems my problem is slightly different to the one in the post linked above - my /proc/cpuinfo shows no Serial / Revision numbers for the CPU - interesting... We'll see what the RasPi people say soon.

Pi-ssentials (Arch)

So I've compiled a list of essential packages for Pi-hacking within Arch linux that I've come across so far.  It will be updated regularly, so watch this space:

  • GNU screen
  • vim (add alias vi='vim' in /etc/profile)
  • sudo (%admin ALL=(ALL) ALL)
  • distcc (useful for compilation with cross compilation on faster machines - check out this article - I've not tried it at the time of writing, I'll produce a separate post when I do)
  • ethtool to debug some issues with networking

NewPi

So, my Pi arrived today.  It is a tiny thing indeed!

I set it up at work.  Was good and didn't get too distracted, but I did load up Debian and have a play.  It's not quick for sure - loading Incentivated's website took about 30 s, and the CPU was at 100 % for most of that time, but that's to be expected I guess.

After a while I tried out the Arch Linux Arm version, which doesn't by default have a GUI, but seems pretty nice. I'm going to stick with that for now.

Now I've got it home, I've got it running on my desk with Arch Linux, bought an HDMI-DVI adaptor and a cheap HDMI cable, which works fine.

I've rebuild the Arch Linux image with larger partitions - I was lazy and did it with a VM running Ubuntu and gparted - 6 Gb root partition, and the rest of the 16 Gb card as data (I'll be symlinking /home and /var).

I've been brainstorming things to do with it.  Ideas so far include:
  • Fishtank automation (Temperature, pH, salinity measurements, light & heater controls)
  • Media centre - somehow - more on this later - I have an awesome idea :)
  • Time machine / backup for my life (in other words, my Macbook Pro)
  • Random web console for when I need such a thing and my laptop is elsewhere - I think I'm going to buy one just for this purpose anyway
Anyway, enough talking, back to some doing!  I'll post more here about the media centre idea soon.